Apex Carbon (2 Sizes)
The Apex Rec/Touring Carbon paddle weights just 27 oz and is the lightest option in the Apex series.
Learn More
The Apex Rec/Touring Carbon paddle weights just 27 oz and is the lightest option in the Apex series.
Learn MoreJoin the Wilderness Systems Email Community
Be the first to know about new products, team news and events.

ADJUSTING YOUR WILDERNESS SYSTEMS PHASE 3 COCKPIT
The Phase 3 cockpit in your Wilderness Systems boat is a multi-component system that was designed for comfort, performance and safety. It is important to get all of the components adjusted properly. The model of kayak you have will determine which components you will need to adjust.
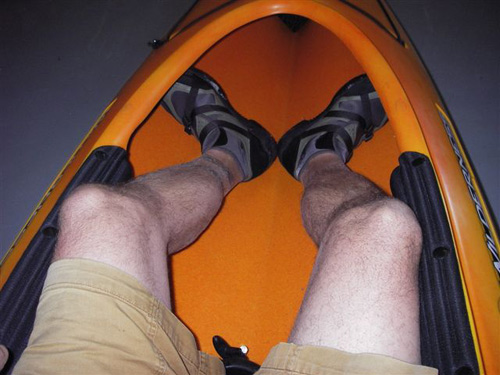
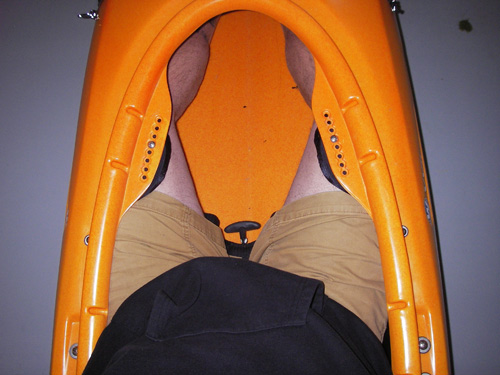
Start by making sure the backrest or backstrap are relatively loose and then sit down in the seat. Now sit up straight, and adjust the footpegs. On boats with no rudder there is a black plastic rod coming aft (towards the back) away from each peg that adjusts the position. Lift the rod slightly to release the peg and then either slide the peg forward or back to find the correct position.
On ruddered models there is a small trigger behind the footpad that you can release with your finger to slide the pad into position. Your heels should be relatively together pointing towards the centerline of the boat and the ball of your foot should be resting on the footpeg pad. Your knees should be slightly bent and angled out towards the sides of the boat. Releasing the rod will lock it in place. With just a slight amount of foot pressure the peg should be snug against your foot.

If you have an open cockpit, Recreation-style kayak, you will find that your knees or thighs will be pressing against 2 black pads attached to the cockpit coaming. Some paddlers prefer a more straight leg position some may want a little more bend at the knee. This is easily adjusted by footpeg position.
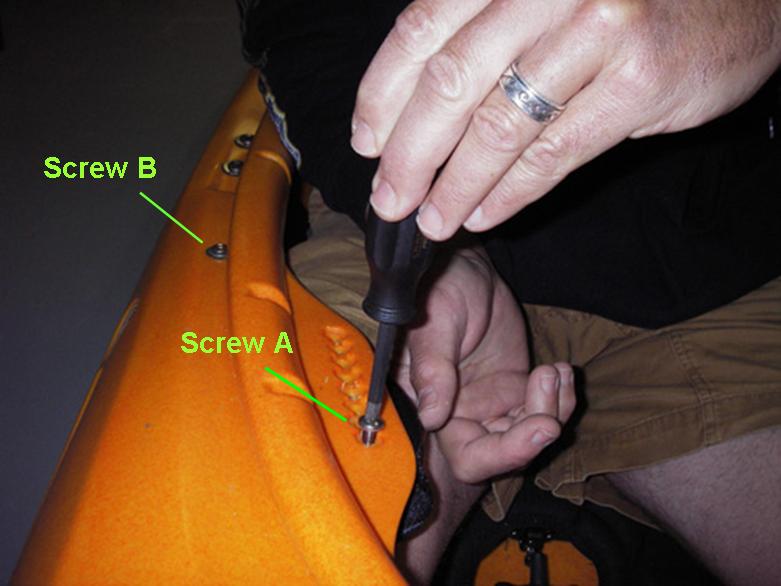
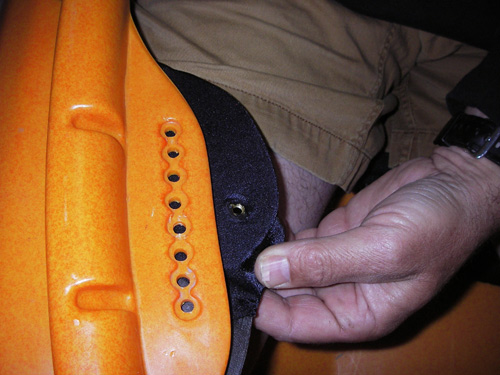
If you have a smaller cockpit found on our Touring or Sea Kayak models adjusting the thigh braces will be next. Sit up straight and push your knees comfortably out towards the sides of the kayak. The thigh brace slides either forward of back to best support your leg in this position. Remove the screw (A) and loosen the screw (B) to adjust. Reposition screw A in the appropriate hole in the coaming and then re-tighten screw B. Experiment to determine your best fit.
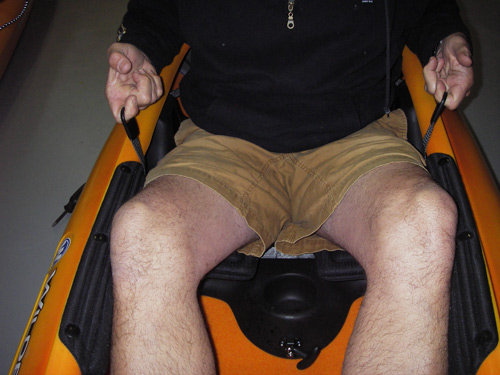
All Models - Once your thighs and legs are correctly positioned you can now pull up on the leg lifters to add support under your legs as well as provide a snug fit against the thigh brace. Find the 2 plastic loops attached to straps just forward of the seat and pull up. The ladder lock buckle can be easily released to lower the lifter.
The back of the seat will either have a solid backrest or a flexible backband. Either of these components should be adjusted loose enough to allow proper torso rotation for good paddling technique. There is a web strap with a buckle on the backside of each that is easily tightened or loosened for adjustment. When properly adjusted you should be able to sit up straight and twist in your seat and not be hindered by the backband or backrest. If you were to relax and lean back it should then contact your back and offer support. On the backband there are also 2 webbing straps attached to the top and 1 attached to the bottom that can be adjusted for correct position. Experiment with these to find the best fit.
On the backrest models the height of the backrest can also be adjusted. The rest should be kept low for paddling and only lifted for relaxed cruising or resting. If the backrest is in the upper position you will limit your range of motion that engages core muscles for better paddling technique. The adjustment is on the front of the seat pad, centered between your legs. Pull up on the plastic toggle attached to a cord to raise backrest and push the small chrome button down to release.
The system is designed to be easy to adjust so experiment to find the most comfortable fit.